Wednesday, April 4, 2012

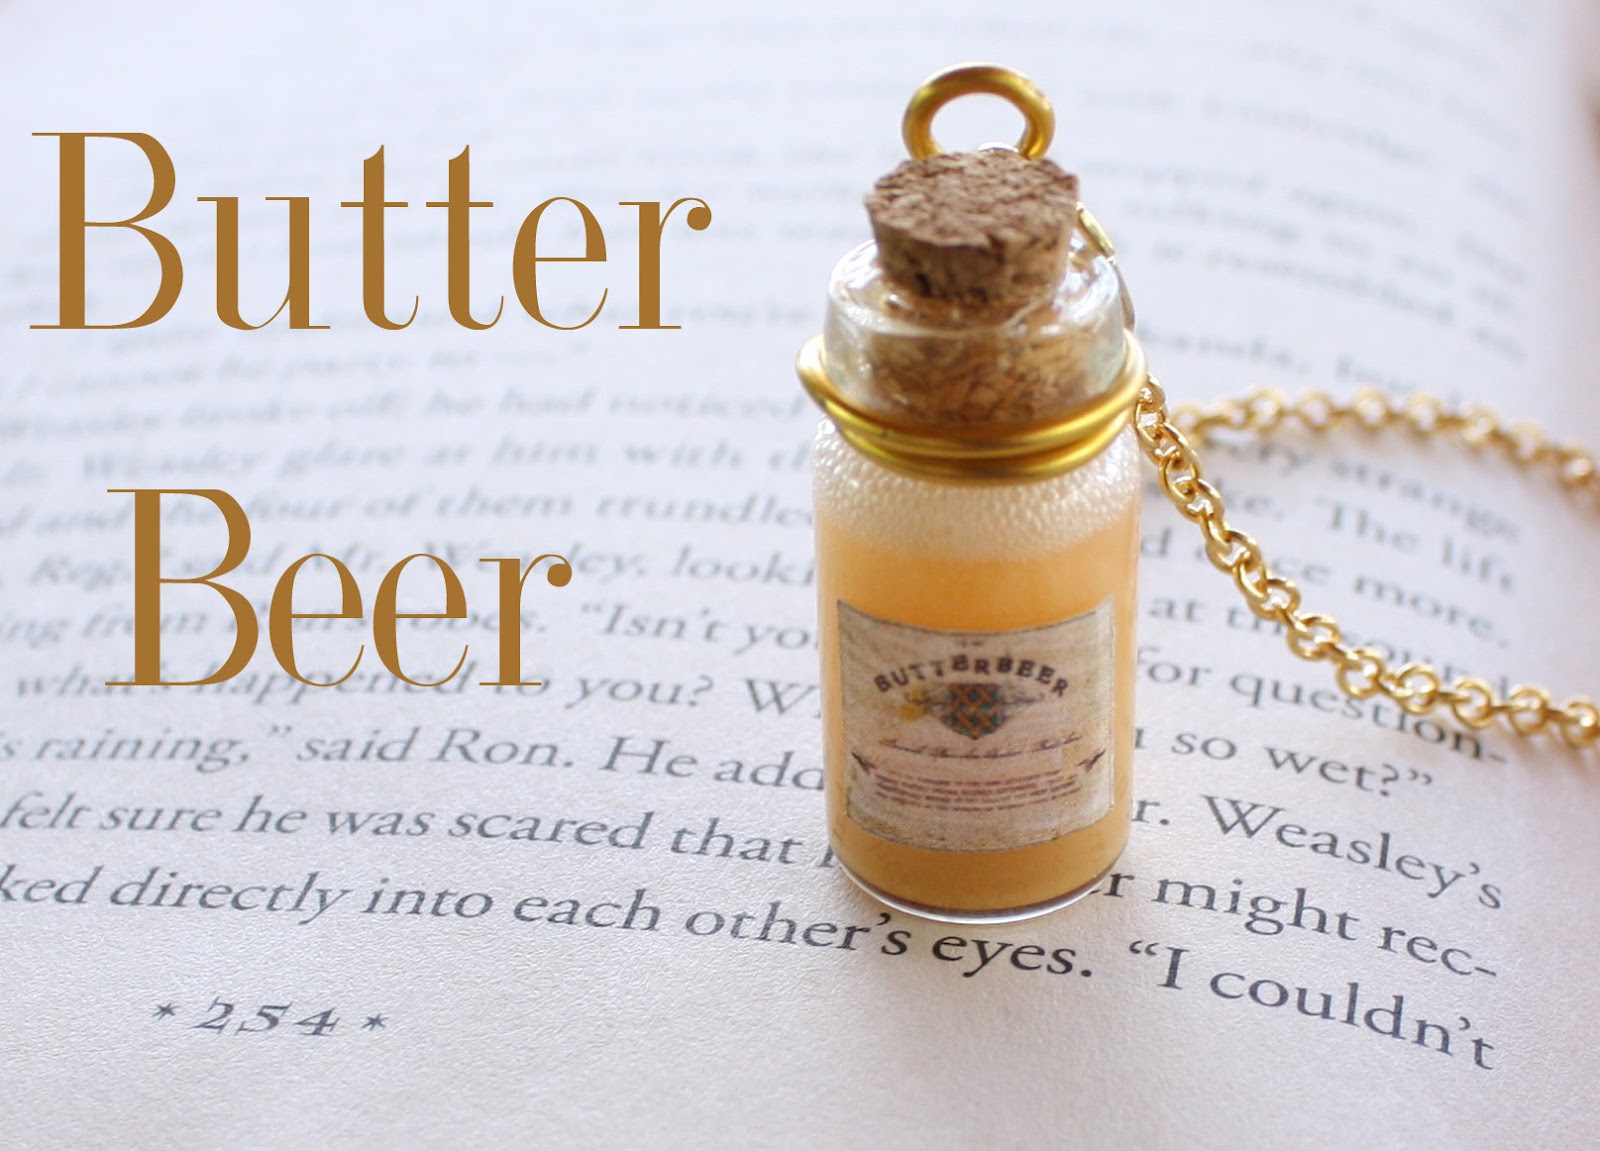
Butterbeer : Harry Potter Potion Ep. # 4

Ok..another non-potion, but still fun. I made this one using the same clear Elmer's glue as I used in the Lumos "episode." I mixed the glue with yellow, brown, & white chalk for the color, and did it vigorously enough so there would be bubbles (or froth) at the top:)

I   U S E D :

Color Chalk (From Hobby Lobby, but you can also get them from Wal-Mart) : Brown, Yellow, & White

20 Gauge Gold wire & A gold jumpring

Pliers

Clear Elmer's Glue (From Joann's Fabric)

Miniature Bottle (From Michael's)

Miniature Butterbeer Label :
I did a Google image search for a Butterbeer label, and came a cross this one with a Hogwart's Crest. I don't remember the site, or else I would link it here, but I'm sure you can find the same one with a little persistence though. Make it very small, and print out a few so you can have some extras, and make them in a few sizes in case one is too small or too large.

I'll be uploading another video right after this one:)

As always have fun!
XOXO,
Toni

Tuesday, April 3, 2012

Lumos : Harry Potter Potion Ep. # 3


Potion #3 isn't actually a potion, it's a spell called Lumos. It creates light at the end of the caster's wand!


M A T E R I A L S :

Bottle : Ideology - Michael's

E600 Glue (To glue on the cork top)

Elmer's Clear Glue (To fill the bottle & To replace the resin)

Martha Stewart Glitter in STERLING & CRYSTAL FINE

20 Gauge wire : I wrapped the wire around the neck of the bottle about two full times, then tuned the end into an "eye-pin." This is a great solution for bottles that don't have eye-pins going through the top/cork.

Miniature "Lumos" Label : I typed out the word lumos in a word document (in very small font) & added a little Hogwarts Crest to the top. I then cut out the label & burned the edges with a lighter. Be careful with this part because the label will burn quickly!

Have fun!
XOXO,
Toni

Monday, April 2, 2012

Starbucks Coffee & Drinks


There are about five drinks that I order at Starbucks, and I've made them into charms. I'm eventually going to make the French Roast Coffee cup into a necklace and layer it with a few other of my favorite necklaces:D


C O L O R S    I     U S E D :
Strawberries & Cream Frappuccino : Red FIMO, Translucent, & White

Coffee : White, Dark Brown

Lemonade : FIMO Glow-In-The-Dark & FIMO Translucent White (For the Ice)

Mocha Frappuccino : Ecru, & Brown 

Green Tea Frappuccino : Translucent Green & White


S T R A W S :
I rolled out a strip of green clay, and baked it. Then I cut then into small (1/2 inch) strips to place in each drink. Use a needle to make a hole for the straw to be placed in. I secured the straws with Translucent Liquid Sculpey, but you can also use a strong glue.


M I N I    S T A R B U C K S    L O G O :
To make the miniature Starbucks logo, I did a simple Google image search for a "starbucks logo," then copied it into a word document & made it small enough to fit on a miniature cup. I had to try a few sizes before I found one that was the right size.


W H I P P E D    C R E A M :
I used Pluffy clay in white for the whipped cream & a #14 star cake decorating tip. I put some of the Pluffy into the tip, and used the end of a paintbrush to push out the clay. I then added it to the top of the drink, and used Translucent Liquid Sculpey for extra strength.

If you have a question post it as a comment, or email me @ ilyatoni@gmail.com.

XOXO,
Toni

Starbucks Tutorial Below:

Saturday, March 31, 2012

Black Forest Cake

I finished this project earlier than planned so I decided to share it! I made the cake using simple circular (miniature) cookie cutters that are a little over an inch in diameter. I used burnt umber, white, and red...pretty easy huh! A link to the video tutorial is at the bottom of the page.

Well earlier today I went to Michael's to pick up those miniature bottles, and I have to make a corrections. They aren't made by Reflections, they're made by Jim Holtz Idealogy, and they're called corked vials.


This is what they look like, and I'm going to use these in the next Harry Potter Potion Episode. These are a little trickier to work with since they don't have headpins already in the tops, but they aren't impossible to use:)

Anyway, this is one of the first weekends where I haven't been out (and not able to make videos), so I'm taking full advantage of it!

I'll be uploading new video(s) tomorrow, so Happy Saturday night...even if you're at home.

XOXO,
Toni


Black Forest Cake Tutorial Below:

Polyjuice : Harry Potter Potion Ep. # 2


So this is the second of many Harry Potter Polyjuice potion tutorials to come. It's very simple to make as long as you have the supplies on hand. Basically you print out a small "label" that says Polyjuice Potion on it. I just typed out the word in a Word document (along with other potions I wanted to make), printed them, and cut them out individually. I also added a small Hogwart's Crest to the label for fun.

This potion label was printed out on regular white printer paper..nothing special. I burned the edges with a lighter which can be tricky, but gets easier after a few practice runs (so print out extras to practice on if you want to try this version.

You'll need:
1. Miniature bottle (purchased at Hobby Lobby, but you can find similar bottles at Michael's craft store too)
2. Easy Cast Resin (Or any kind of resin you like. Also purchased at Hobby Lobby)
3. Folkart Acrylic Paint in "Old Ivy"
4. Printed mini label
5. Toothpick
6. Bathroom plastic cup (to mix the resin in)
7. E600 glue

Have Fun!
-Toni

Watch the tutorial below!

Wednesday, March 28, 2012

Amortentia - Love Potion - Harry Potter Potion Tutorial #1

It's safe to say that I'm a die-hard Harry Potter fan, and I truly loved making the potions from the entire series. 

I've had a few requests to show how I make certain potions so I'm going to do an entire series (close to twenty parts) and show how I made each one. If you'd like to see the potions I've created in the past you can click here and here.

Materials Needed:
1. Miniature glass bottles (you can find them at hobby lobby or michael's)
2. Resin (Any kind, or you can even substitute the resin for water or Fimo Deko Gel if you like)
3. Toothpick
4. Cup (To mix the resin)
5. Red marker (Or red food coloring, red pastel chalk, etc.)
6.Glue (E600)
7. Miniature label (I made it by printing the word Amortentia on tan paper)


 Once you glue the label to the bottle you're finished, and now you can add it to necklace or a key chain. These make great gifts, especially if you have friends that love Harry Potter as much as mine do!

The video is below for extra help!


Tuesday, March 27, 2012

Full English Breakfast

A full English breakfast complete with toast, fried eggs, baked beans, black pudding, vine tomatoes, bacon, sausage, and a mushroom. This was made completely from polymer clay.

You can turn this plate into a ring by gluing a ring base to back of the plate. Be sure to glue down each piece of food as well. This could also be made into a necklace. Or if you'd rather not make it into jewelry you can just add it to your collection.


Baked Beans
1.     Mix equal portions of ecru color (Premo) polymer clay & translucent.
2.     Roll the mixture into a thin strip, & cut small pieces which will be the beans
3.     Mix reddish brown & yellow ochre chalk with Fimo Deko Gel. This will be the baked beans sauce.
4.     Mix the sauce mixture with the beans, and set aside.


Vine Tomatoes

1.     Mix red and translucent polymer clay together.
2.     Roll out the mixture & cut small pieces, which will be the tomatoes.
3.     Use leaf green for the leaves. Cut small triangle shapes which will be the leaves. Add the leaves to the top of each tomato. Each tomato should have about 5 leaves.


Black Pudding
1.     Wrap a small log of brown clay in black clay.
2.     Close the seams.
3.     Roll the mixture to smooth the seam.
4.     Cut off the edge, and discard. Now cut even slices & texture with sandpaper.

Sausage
1.     Mix a small amount of red with translucent for the raw sausage color.
2.     Roll out the mixture, and cut into thin pieces.
3.     Soften and smooth the edges.
4.     Shade the sausage with brown & black chalk. This will help the sausages look cooked.

Mushrooms
1.     Mix translucent, ecru, and white for a mushroom color.
2.     Make two small caps, and use a ball tool to hollow the caps.
3.     Roll out thin strips and cut small stalks.
4.     Attach the stalks to the caps.

Fried Egg
1.     Mix white and translucent for the egg white.
2.     Mix yellow and a small amount of orange for the egg yolk.
3.     Add Fimo Deko Gel to the top of the egg yolk for a realistic look.

Bacon
1.     Color mixtures: Yellow Mixture – Mix a small amount of yellow, and ecru with a larger amount of translucent. Light Red Mixture – Mix a small amount of red, yellow, and orange with a larger amount of translucent. Deep Red Mixture – Mix 1 part red clay with 2 parts translucent clay.
2.     Lay out a rectangular piece of the yellow clay.
3.     Add two pieces of the light red mixture to either side.
4.     Add a piece of the yellow mixture to fill the space between the light red mixture.
5.     Add a thin strip of the yellow mixture on top.
6.    Add another strip of the deep red mixture to the top of the slab.
7.     Now stretch the mixture but squeezing and pulling it.
8.    Cut a few strips. Texture them with a ball tool or a toothpick.
9.    Shade the strips with brown chalk to make them look cooked.

Toast
1.     Mix white, translucent, and a small amount of ecru for the bread loaf.
2.     Use a toothpick to create indents on either side of the loaf.
3.     Cover the loaf with yellow ochre, & brown chalk.
4.     Use sandpaper to texture the bread slice.
5.     Use a needle to texture the inside of the bread slice.