I actually planned on making something else for Easter, but I failed. So instead I made this ring, and I'm in love with it. I've never tried to color roses with chalk before and I'm really happy with the result.
I made the ring using Ivory colored polymer clay, and used hot pink chalk to give the edges some color. I baked the ring for about 30 minutes at 275 degrees Fahrenheit. I glued the rose to a ring base that I got from Hobby Lobby. If you don't have you're own ring base just make you're own using polymer clay. So have fun making your own and wear it this Easter weekend.
A miniature cup of tea & two fruit tarts. Own of my favorite necklaces that I own has this miniature Dutch Delft teacup on it as a charm. I love it because it's so tiny and delicate.
I U S E D:
Miniature Dutch Delft Tea Cup (Ebay)
FIMO Deko Gel (Ebay): Be sure to bake the FIMO Deko Gel, and you can use resin as a substitute if you don't have any on hand.
So we're at potion #5 and it Felix Felicis! A potion that is also called liquid luck.
I made mine into a necklace, but of course you can turn yours into a key chain, or a charm.
I U S E D :
Gold Polymer Clay (FIMO)
TLS (Translucent Liquid Sculpey)
Needle Tool
Miniature Bottle (Hobby Lobby)
Miniature Label : The same as before...I typed the words "Felix Felicis" out very small and added a mini Hogwart's Crest to the label. I then burned the edges with a lighter for an aged look.
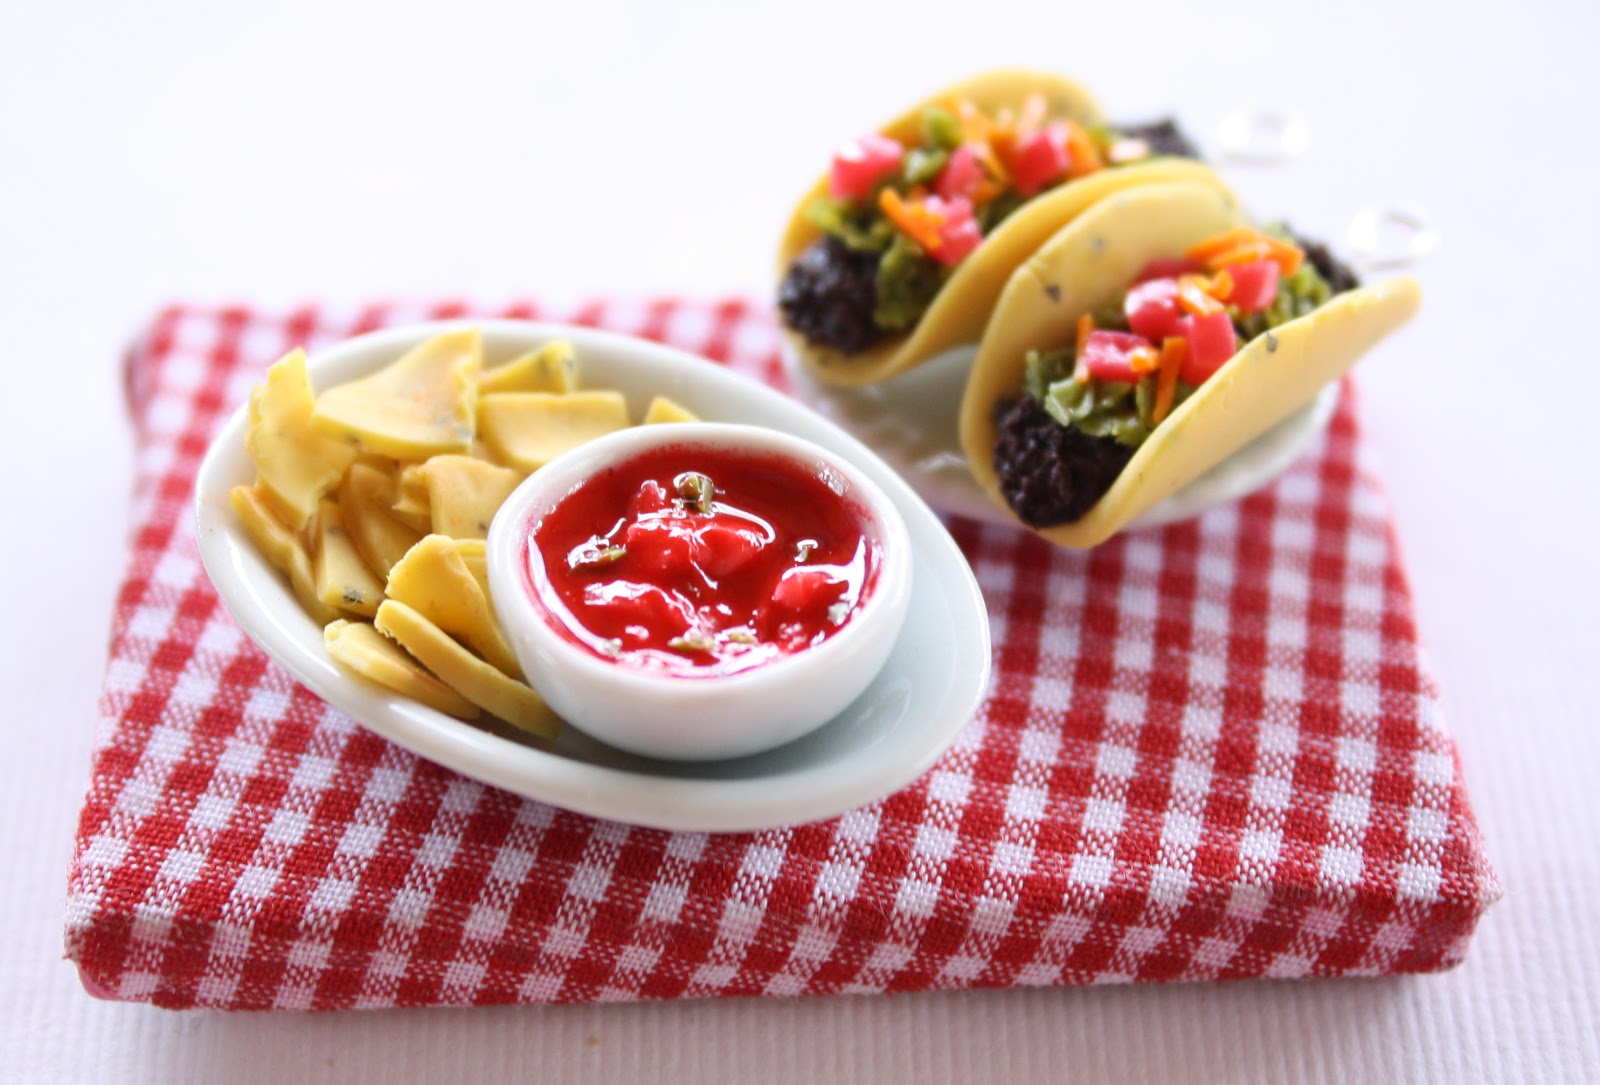
A miniature Mexican feast. One of my favorite meals...miniaturized. It's pretty simple & was really fun to make. I made the tacos with headpins so they could be turned into earrings.
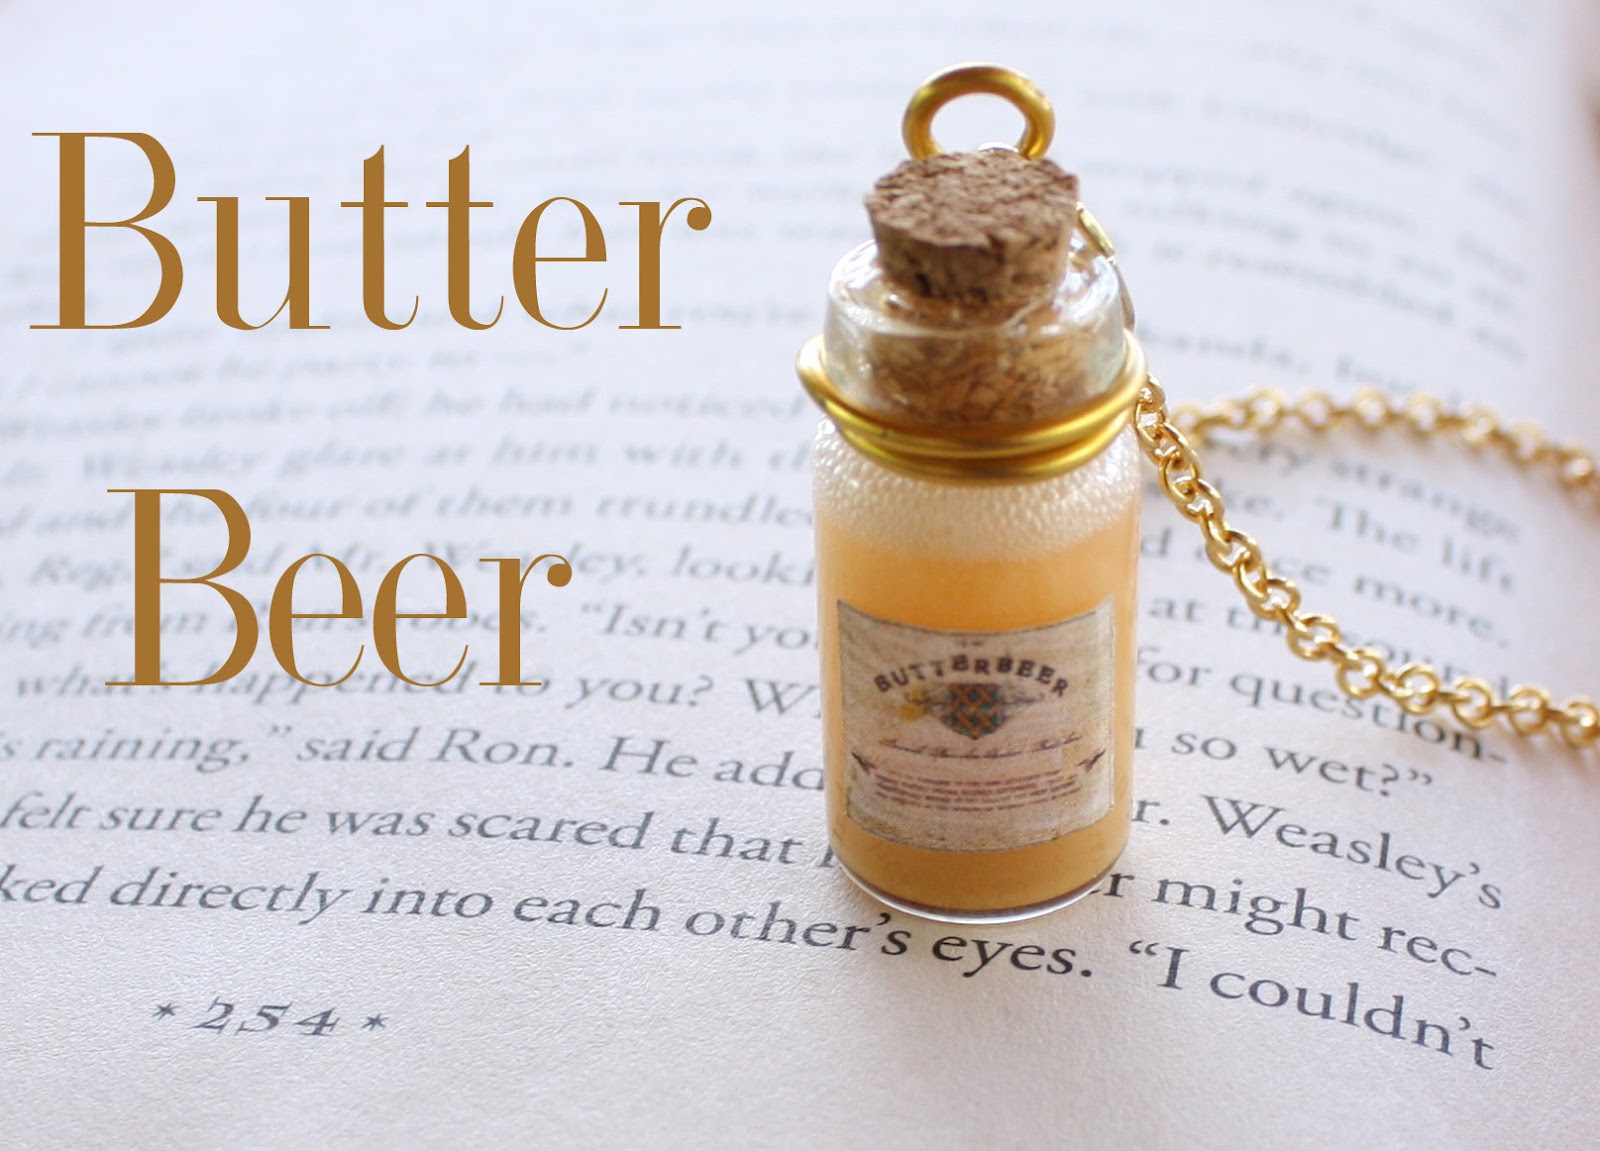
Ok..another non-potion, but still fun. I made this one using the same clear Elmer's glue as I used in the Lumos "episode." I mixed the glue with yellow, brown, & white chalk for the color, and did it vigorously enough so there would be bubbles (or froth) at the top:)
I U S E D :
Color Chalk (From Hobby Lobby, but you can also get them from Wal-Mart) : Brown, Yellow, & White
20 Gauge Gold wire & A gold jumpring
Pliers
Clear Elmer's Glue (From Joann's Fabric)
Miniature Bottle (From Michael's)
Miniature Butterbeer Label :
I did a Google image search for a Butterbeer label, and came a cross this one with a Hogwart's Crest. I don't remember the site, or else I would link it here, but I'm sure you can find the same one with a little persistence though. Make it very small, and print out a few so you can have some extras, and make them in a few sizes in case one is too small or too large.
I'll be uploading another video right after this one:)
Potion #3 isn't actually a potion, it's a spell called Lumos. It creates light at the end of the caster's wand!
M A T E R I A L S :
Bottle : Ideology - Michael's
E600 Glue (To glue on the cork top)
Elmer's Clear Glue (To fill the bottle & To replace the resin)
Martha Stewart Glitter in STERLING & CRYSTAL FINE
20 Gauge wire : I wrapped the wire around the neck of the bottle about two full times, then tuned the end into an "eye-pin." This is a great solution for bottles that don't have eye-pins going through the top/cork.
Miniature "Lumos" Label : I typed out the word lumos in a word document (in very small font) & added a little Hogwarts Crest to the top. I then cut out the label & burned the edges with a lighter. Be careful with this part because the label will burn quickly!
There are about five drinks that I order at Starbucks, and I've made them into charms. I'm eventually going to make the French Roast Coffee cup into a necklace and layer it with a few other of my favorite necklaces:D
C O L O R S I U S E D :
Strawberries & Cream Frappuccino : Red FIMO, Translucent, & White
Coffee : White, Dark Brown
Lemonade : FIMO Glow-In-The-Dark & FIMO Translucent White (For the Ice)
Mocha Frappuccino : Ecru, & Brown
Green Tea Frappuccino : Translucent Green & White
S T R A W S :
I rolled out a strip of green clay, and baked it. Then I cut then into small (1/2 inch) strips to place in each drink. Use a needle to make a hole for the straw to be placed in. I secured the straws with Translucent Liquid Sculpey, but you can also use a strong glue.
M I N I S T A R B U C K S L O G O :
To make the miniature Starbucks logo, I did a simple Google image search for a "starbucks logo," then copied it into a word document & made it small enough to fit on a miniature cup. I had to try a few sizes before I found one that was the right size.
W H I P P E D C R E A M :
I used Pluffy clay in white for the whipped cream & a #14 star cake decorating tip. I put some of the Pluffy into the tip, and used the end of a paintbrush to push out the clay. I then added it to the top of the drink, and used Translucent Liquid Sculpey for extra strength.
If you have a question post it as a comment, or email me @ ilyatoni@gmail.com.